
There is something so special about handmade decor, especially as we head into the summer months. With Memorial Day and the 4th of July just around the corner, this simple quilted american flag bunting is such a sweet way to add a patriotic touch to your home.
This project is beginner-friendly, quick to put together, and perfect for using up smaller fabric pieces. You can make just one, or create a whole string of them to form a beautiful banner for your porch, mantel, or backyard gatherings.
Materials Needed
- Blue fabric
- Red fabric
- White fabric
- Backing fabric
- Batting
- Thread
- Sewing machine
- Pinking shears
- Free bunting template (download here)
Cut List
- Blue fabric: 1 square (3.5” x 3.5”)
- Red fabric:
- 1 small strip (2” x 3.5”)
- 2 long strips (2” x 6.5”)
- White fabric:
- 1 small strip (2” x 3.5”)
- 1 long strip (2” x 6.5”)
- Backing fabric: 7” x 8”
- Batting: 7” x 8”
Video Tutorial
Step 1: Build Your Base
Start by laying your backing fabric flat, then place your batting on top.
Take your small red strip and place it in the top right corner. Layer the small white strip on top of the red strip.
Sew along the bottom edge of the white strip using a ¼” seam allowance, then press open (finger pressing works just fine).
Step 2: Add the Blue Square
Place your blue 3.5” x 3.5” square on top of the small strips, aligning the left edge with the left side of the strips.
Sew along this left edge using a ¼” seam allowance, then press open.
Step 3: Add the Stripes
Now you’ll begin building your stripes.
Lay a long red strip across the blue square and white strip, aligning the bottom edges. Sew along this line with a ¼” seam allowance, then press open.
Repeat this process with the remaining strips:
- Add the next strip
- Sew along the edge
- Press open
Continue until all strips are attached.
Step 4: Shape Your Bunting
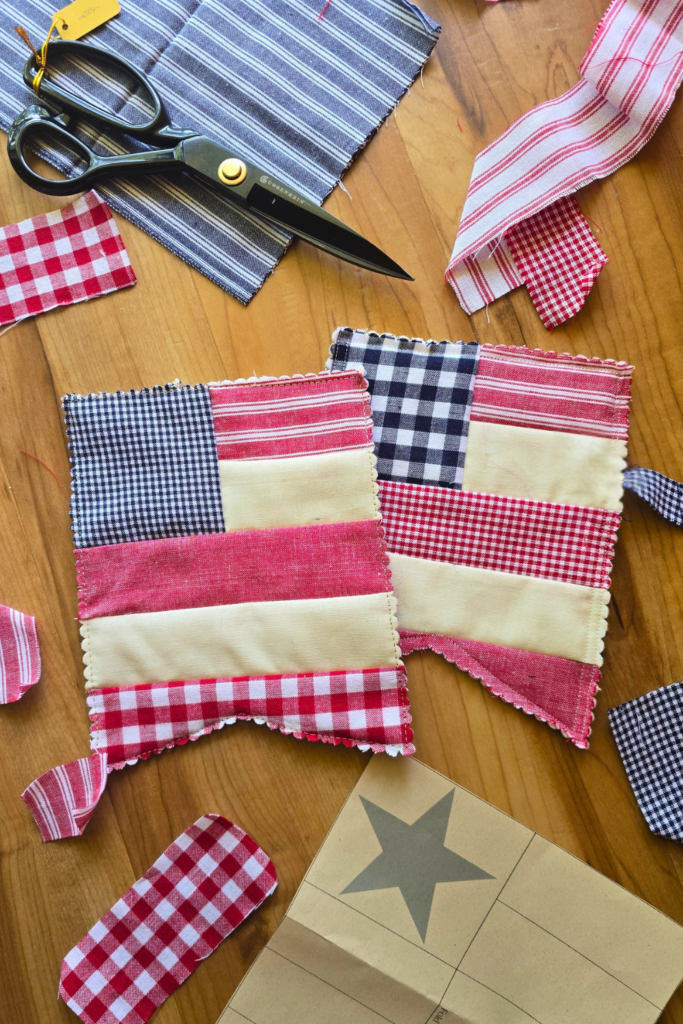
Once your final strip is sewn and your american flag bunting is pressed, take your template and center it on your quilt top.
- If your quilt top is slightly larger than the template, trace around the outer edge
- If not, simply mark the point of the swallowtail
Sew around the entire perimeter using a ¼” seam allowance, sewing carefully up to the marked point to create the swallowtail shape.
To change directions at the corners of your project lower the needle, lift the presser foot and turn your bunting to the angle you need for the next line of stitching. Lower the presser foot and begin sewing again.
Step 5: Finish the Edges
Using pinking shears, trim around the edges of your quilted American flag bunting.
Cut close to your stitch line, but be careful not to cut into your stitches. This gives your bunting that soft, raw, scalloped edge that adds so much charm.
And just like that—you’re done!
How to Turn It Into a Banner
You can absolutely stop at one, but this project really shines when you make a few.
Try mixing and matching:
- All blue pieces
- Red and white stripes only
- Or a mix of all three
Once you have several finished buntings, you can:
- Sew them onto a piece of rope or twine
- Or create small slits in the backing fabric and thread a knotted rope through
Both options create a beautiful, draped banner effect that’s perfect for summer decorating.
*Bonus Idea* Add in a layer of Insul-Bright and you can use as a quilted American flag bunting hot pad!
A Final Note
This is one of those projects that feels just as lovely to make as it does to display. It’s simple, a little nostalgic, and full of handmade charm.
I hope you’ll give yourself permission to go slow, enjoy the process, and maybe even make it part of a quiet afternoon at home.
If you make one (or a whole string!), I would truly love to see it. You can always tag me @thecozykeeperblog so I can cheer you on 🤍
Pin for Later!
Leave a Reply