
Learn how to make a darling felt play oven mitt with this easy, hand-stitched tutorial. Includes a free printable template perfect for your little chef’s play kitchen!

A few years ago, I made a felt stick horse for my nephew’s birthday. That single project was the start of a long-standing love affair with wool felt.
There is something so incredibly forgiving about working with felt. Unlike traditional fabric, there is usually no “turning inside out,” no fraying edges, and no complicated seam allowances. It is straightforward, tactile, and sweet. Since that birthday gift, I’ve looked for every excuse to use felt—from my Storybook Hooded Cloak to the project I’m sharing today.
A Spark of Inspiration
We gifted our one-year-old a darling play kitchen for Christmas this year. The other day, while watching her “cook,” I noticed she was using a mesh produce bag as a makeshift oven mitt.
Necessity is the mother of invention, right?
Within the hour, she had a sweet little felt mitt of her own. This project was such a joy to make and turned out too cute not to share. If you have a little chef at home who loves to pretend, this is a perfect, easy, hand-stitched project for a nap-time DIY.
What You’ll Need
*Disclaimer: This is intended for pretend play only and should not be used to protect from heat.
- Felt (Two pieces large enough for the template)
- Contrasting Felt Strips: Two strips (4″ x 0.5″) for the trim.
- Loop Strip: One strip (2.5″ x 0.5″) for the hanging loop.
- Embroidery Floss: (I recommend 3 strands for a subtle look, or all 6 for a bold, chunky stitch).
- The Template: You can make one yourself or download my free Felt Play Oven Mitt Template below

The Tutorial
1. Trace and Cut Using your little chef’s hand, trace a mitten shape (thumb out, fingers together). Make sure to leave a 0.25″ to 0.5″ margin around their hand so it’s easy for them to slip on and off. Cut two identical pieces. Tip: You can skip the tracing and use my printable template below!
2. Add the Trim At the bottom of each mitt piece, place your contrasting felt strip. Sew it on as a trim—you can use a sewing machine for speed or hand-stitch it for a fully handmade look.
3. Prepare the Loop Take your smaller strip for the loop. You can fold it over and sew down the middle for extra detail, or simply leave it as a flat strip.
4. Assemble Place your two mitt pieces wrong sides together. The beauty of felt is that we don’t have to worry about hiding seams on the inside—the exposed stitching is part of the charm! Pin or clip the pieces in place.
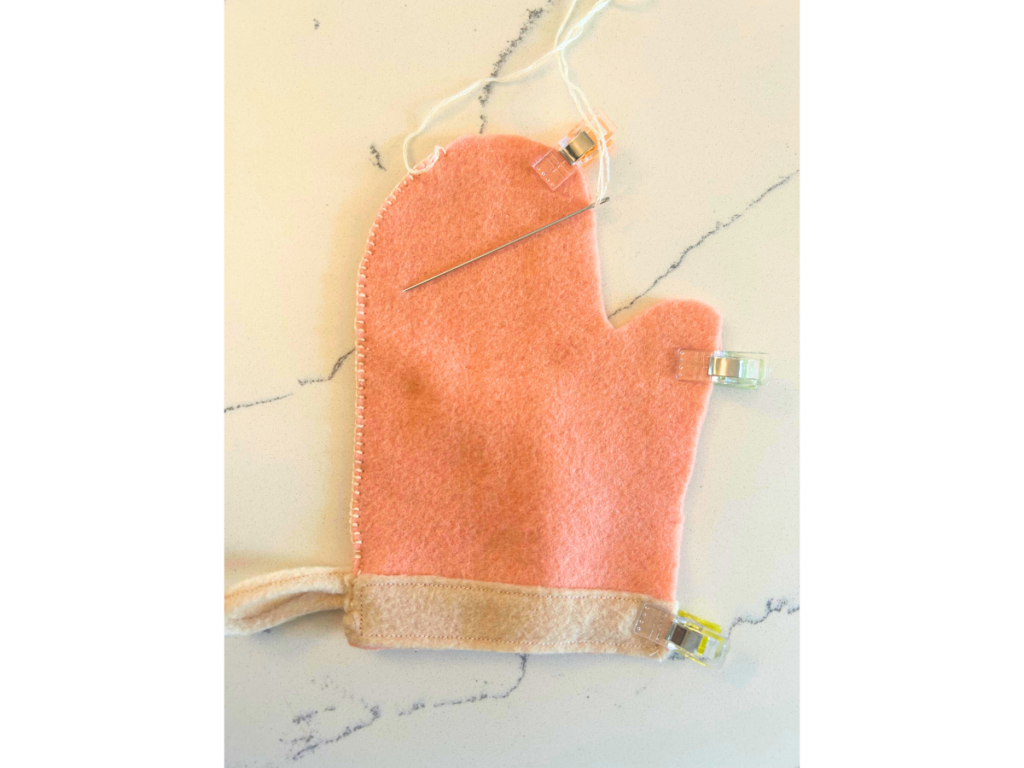
5. Secure the Loop Fold your loop strip in half and tuck the raw ends between the two mitt pieces (usually on the side opposite the thumb). Pin it securely.
6. The Finishing Stitch Using a blanket stitch, sew around the perimeter of the mitt, leaving the bottom open. When you reach the hanging loop, switch to a straight or backstitch to ensure it’s anchored well for tiny hands.
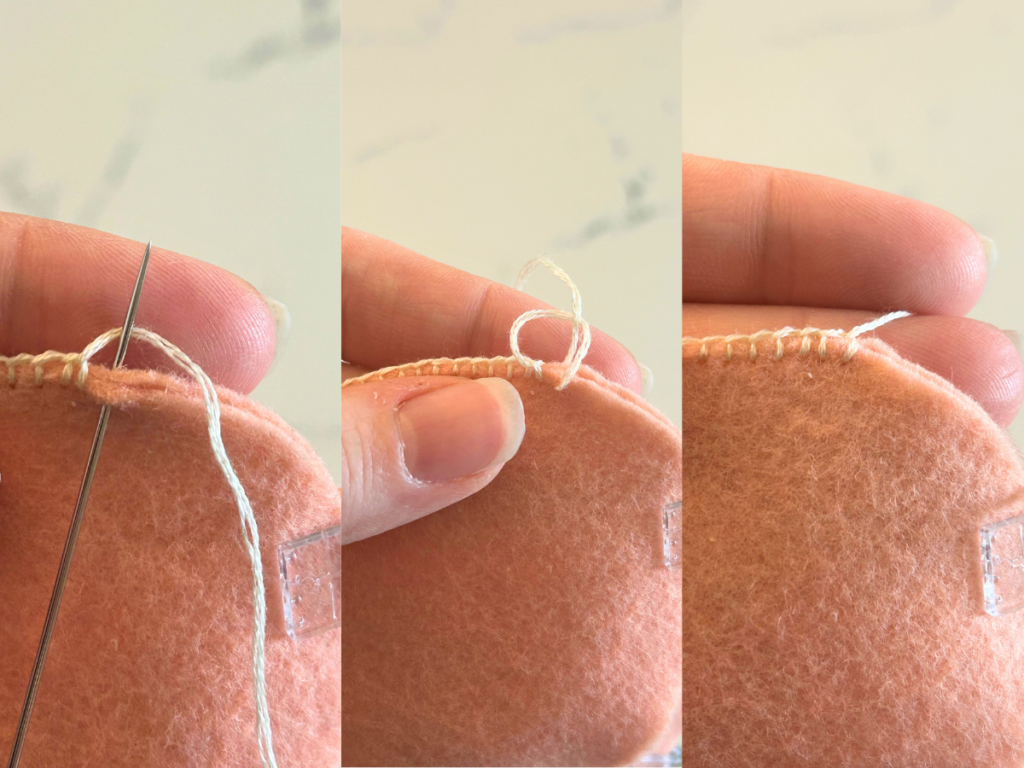
A Note on Floss: Embroidery floss is made of 6 thin strands twisted together. For a very pronounced, “storybook” look, use all 6. For this version, I used 3 strands for a more delicate finish.
And That’s It!
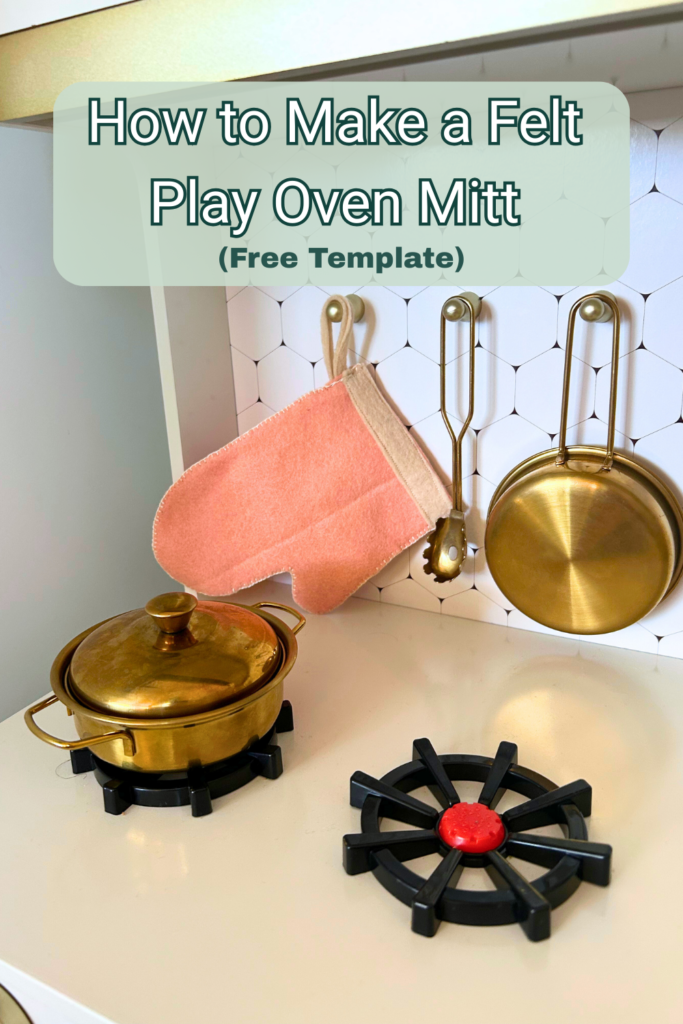
You now have a darling, heirloom-quality felt play oven mitt to hang on the play kitchen. It’s a small detail that makes their pretend world feel just a little bit more magical.

Want to make one this weekend? I’ve created a simple, print-ready template to help you get the sizing just right.
Sizing tip!
This pattern makes an oven mitt that more than comfortably fits my almost 2 year old. My six year old son has to try a little harder to get it on. If making for an older child I would add a little margin around the template as you are cutting it out. You can also lay your child’s hand over the mitt template prior to cutting it out and make sure it looks large enough just to be safe!
Get Your Free Felt Play Oven Mitt Template Here!
Pin for Later!
Leave a Reply