
If you love decorating for spring with handmade touches, this DIY Easter garland might be your new favorite project.
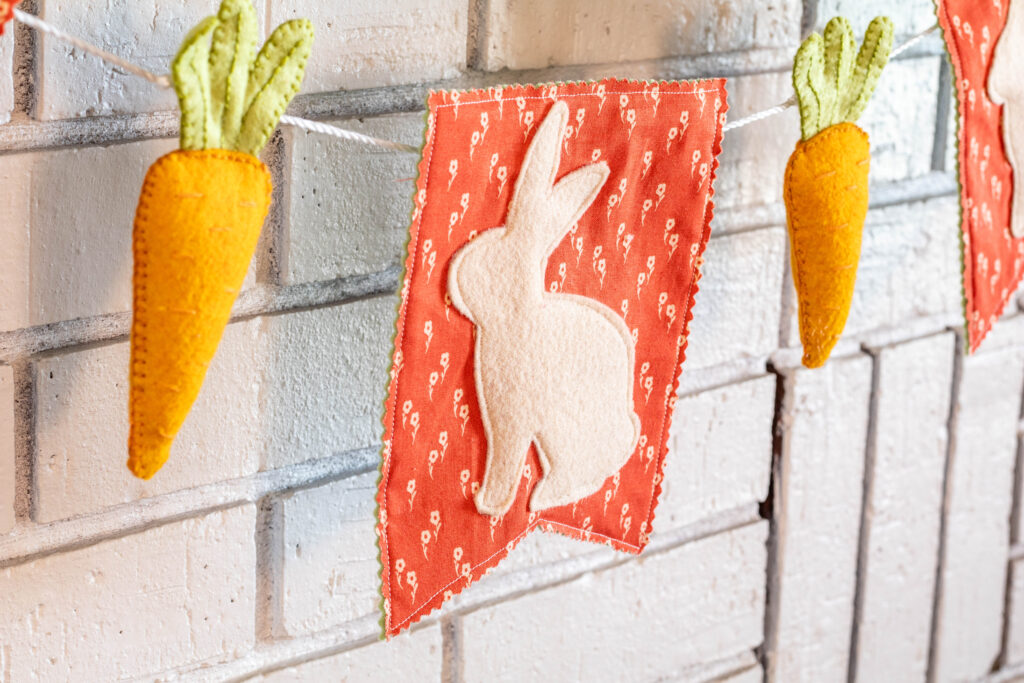
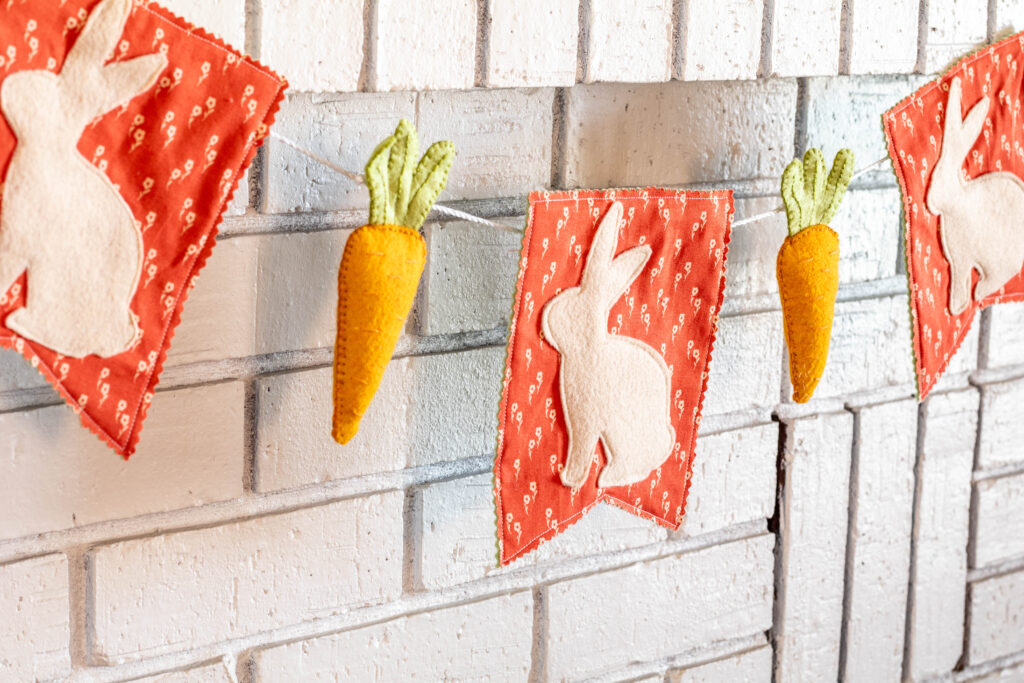
There’s something so sweet about soft felt, stitched details, and a garland draped across the mantel as the days grow lighter. This cozy felt bunny bunting adds just the right amount of charm to your Easter décor — simple, timeless, and completely customizable.
Whether you’re decorating your hearth, a shelf, a nursery, or hosting a spring gathering, this handmade Easter banner creates that warm cottage feel without looking overly themed or commercial.
If you’d like the printable templates that make this project easy to assemble, you can grab them here:
👉 Bunny Bunting Garland Pattern
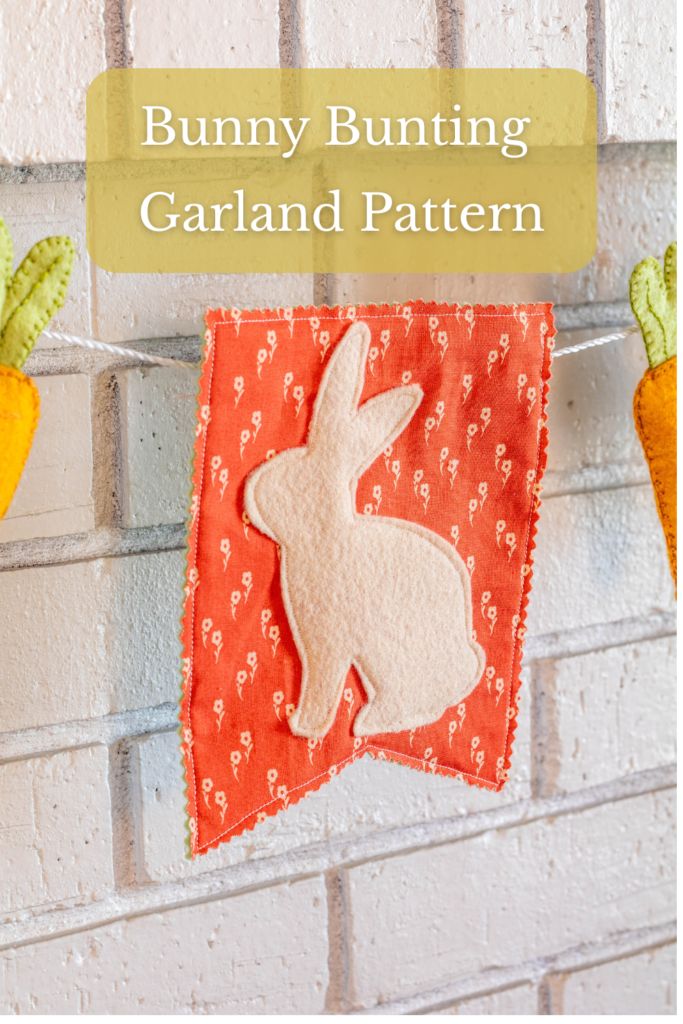
For my 7-foot mantel, I used 9 banners and 8 carrot accents, but you can adjust the length to fit your space.
Why You’ll Love This DIY Easter Garland
This isn’t just a craft — it’s a keepsake-style decoration.
- Soft cotton and felt textures
- Layered bunny appliqué detail
- Customizable length
- Optional no-sew method
- Sweet carrot plush accents for added charm
It’s perfect if you’re looking for:
- DIY Easter décor ideas
- Handmade spring garland inspiration
- Cottagecore Easter decorations
- Felt bunny craft projects
Materials for Your Easter Bunny Garland
To make this DIY Easter garland, you’ll need:
- Felt (for banner backing and bunnies)
- Fabric of choice (for banner fronts)
- Embroidery floss
- Needle or sewing machine
- Scissors
- Pinking shears
- Pins or clips
- Twine or yarn
- Yarn needle
- Hot glue (optional for no-sew version)
Step 1: Prepare the Felt Bunny Banner Pieces
Start by printing and cutting your template pieces.
From felt, cut:
- Multiple bunny shapes
- Banner backing pieces
From your fabric, cut:
- Matching banner front pieces
Tip for Perfect Swallowtail Points
For evenly cut banner points, fold your banner template in half and fold your fabric in half. Match the folded edges, clip them together, and cut along the shape. This ensures symmetrical, clean edges.
On each felt backing piece, cut two small vertical slits near the top. These will be used later to string your Easter garland.
Step 2: Attach the Felt Bunny Appliqué
Center one felt bunny on each fabric banner piece.
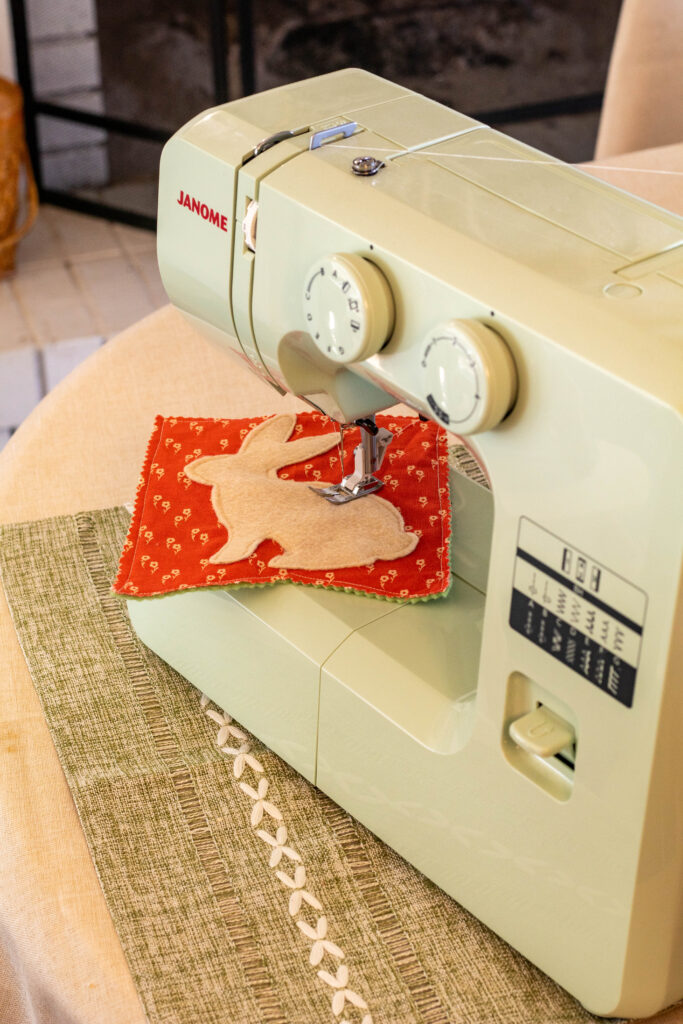
An easy trick for perfect placement: cut the bunny shape out of your banner template and use that opening as a guide to center your appliqué.
Secure the bunny using one of these methods:
- Sew around the perimeter of the bunny by hand or machine.
- Carefully apply hot glue around the edges and press firmly into place.
Step 3: Assemble the Easter Banner
Layer your pieces:
- Fabric banner (bunny facing outward)
- Felt backing behind it
Pin or clip in place.
Sew around the perimeter using a ¼-inch seam allowance.
Trim edges with pinking shears for a decorative finish (be careful not to cut your stitches).
Repeat until all banner pieces are assembled.
Step 4: String Your DIY Easter Garland
Thread twine or yarn onto a yarn needle.
Run the twine through the slits on the back of each banner.
To maintain spacing:
- Tie a knot before the first slit
- Tie another knot after the second slit
Repeat for each banner until your garland reaches your desired length.
Bonus: Add Felt Carrot Accents

If you’d like to make your Easter garland extra special, add plush felt carrot accents between banners.
These soft carrots bring a playful, handcrafted touch that looks beautiful styled along a mantel.
Styling Your Easter Bunny Garland
This DIY Easter garland looks beautiful:
- Draped across a fireplace mantel
- Hung above a window
- Styled on a nursery wall
- Layered with spring florals
- Used as party décor
The soft felt textures pair beautifully with natural wood, woven baskets, fresh greenery, and neutral spring tones.
Make Your Own Cozy DIY Easter Garland
If you’re ready to create your own felt bunny bunting, you can find the printable template set here:
👉 Bunny Bunting Garland Template
This project is beginner-friendly, customizable, and such a sweet way to welcome spring into your home.
Pin for Later!
Find more Spring content below!
How to Create a Cozy Spring Ambience at Home
Leave a Reply